Think of your washing machine’s drain hose as the behind-the-scenes hero of your laundry routine. It works quietly, unseen, whisking away dirty water after each cycle. Yet, when issues arise with this hose, things can get messy fast! That’s why proactive testing and maintenance services are essential to a happy laundry room (and a dry home!).
The Risks of Ignoring Your Drain Hose
- Water Damage on the Rise: The potential for flooding is huge. Even a small leak in your drain hose can spill gallons of water, damaging floors, walls, and even lower levels of your home if your laundry room is upstairs.
- Machine Malfunctions: A blocked or damaged drain hose prevents your washing machine from completing its cycle. You might notice slow draining, water backing up, or even an error code on your washer’s display.
- Costly Surprises: If left unchecked, drain hose issues can lead to more extensive problems within your washing machine or your home’s structure, meaning potentially expensive repairs.
The Simple Drain Hose Checkup
- Look it Over: Disconnect the hose from the back of your washer. Examine it closely for any visible signs of trouble: cracks, bulges, holes, or worn areas. Check the connections too – are they secure and free of rust?
- The Flow Test: Set your machine to a rinse or short wash cycle. Observe where the drain hose empties – is the water flowing out smoothly and rapidly? Any leaks, slowdowns, or unusual noises indicate a possible blockage or damage.
- Internal Inspection: Shine a flashlight down the length of the hose. Can you see any obstructions like built-up lint, small objects like coins or buttons, or even a kink restricting water flow?
More Signs of Trouble
In addition to the physical inspection, keep an eye (and ear) out for these red flags:
- Persistent puddles around your washer, even when it’s not running.
- Wetness along the hose itself.
- Musty smells coming from the machine or hose.
Proactive Drain Hose Care
- Flush It Out: Periodically run a cycle with just hot water and a cup of white vinegar through your empty machine. This helps dissolve buildup inside the hose.
- Inspect the Connection: Make sure the hose is securely attached both to the washer and the drain. Tighten any loose connections.
- No Sharp Bends: The hose should have a gentle curve, preventing kinks that restrict water flow.
- Replace When Needed: Drain hoses don’t last forever. If yours is showing significant wear, replace it before it causes a problem.
fill out our form
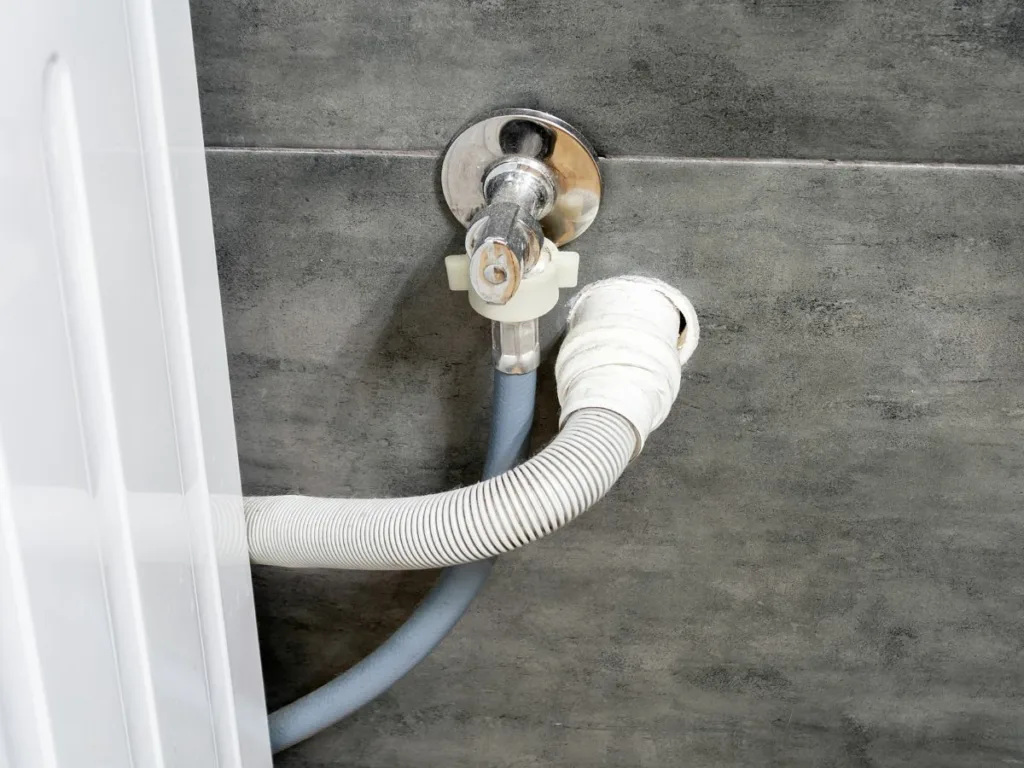
Supply Hoses: Your Water Source Function: These hoses deliver fresh water to your washing machine for each cycle. Typically, you’ll have two hoses: one for hot water, one for cold. Materials:
- Rubber: The classic choice, often budget-friendly, but vulnerable to bursting, especially with hot water.
- Braided Stainless Steel: More reliable and resistant to bursts and kinks. These offer greater long-term protection. Tip: Check your supply hoses frequently. Watch for bulges, cracks, or fraying, and replace them promptly to prevent leaks.
- Drain Hose: Waste Water Removal Function: This wide hose removes dirty water from your washing machine. It often connects to a drainpipe or a standpipe in your laundry area. Material:
- Corrugated Plastic: Flexible and widely used, but can become brittle or develop holes over time.
- Reinforced Rubber: A more robust option than plastic, with greater durability, though potentially at a slightly higher cost. Tip: Ensure a snug fit between the drain hose and the standpipe. Prevent kinks or bends that could impede water flow.
Call us for repairs to your washing machine
Internal Hoses: The Invisible Network Function: Smaller hoses inside your washing machine transport water to parts like the detergent dispenser, washing drum, and pump. Material: Primarily made of rubber designed to handle fluctuating temperatures and water pressure. Tip: If you suspect problems with internal hoses, it’s usually best to call a professional. Signs of trouble include odd noises during cycles, ineffective cleaning, or water accumulating inside the machine.
P-Trap: Odor Prevention (Optional) Function: If your washer drains into a floor drain, a P-trap is wise. Its curved shape traps water, blocking sewer gases from escaping into your home. Material: Typically PVC plastic. Tip: Maintain a clean P-trap. Regularly clear any buildup that could restrict water flow or let unpleasant odors through.
Washing Machine Pan: Your Safety Net Function: While not a pipe, this is a lifesaver! This shallow pan sits beneath your washer, catching leaks before they cause major damage. Material: Plastic or metal. Tip: Consider a washing machine pan essential, particularly if your laundry room is on a higher level. Local building codes may even require one.
Key Takeaways:
- Inspect supply and drain hoses regularly for any signs of damage.
- Opt for high-quality, braided stainless steel hoses for greater durability.
- If leaks or malfunctions occur, immediately shut off your washer’s water supply and contact a plumber if needed.
- A washing machine pan offers low-cost protection against expensive water damage.
Why won't my washing machine drain fully?
A washing machine that leaves water behind after the cycle is frustrating! Here’s how to solve the problem
Assess the drain hose.
A kinked, bent, or clogged drain hose prevents water from flowing out properly. Straighten any kinks, and examine the hose for blockages
Inspect the drain pump
. Small items like coins, buttons, or hair ties can get stuck in the drain pump. Carefully remove any debris that may be hindering the pump’s operation.
Clean the pump filter.
Lots of washing machines have a pump filter designed to catch lint and small objects. Unscrew the filter, clean it thoroughly, and replace it securely.
Look at the the lid switch (top-loaders only).
Top-load machines won’t drain or spin with the lid open. Make sure the lid switch is engaging correctly; it might be faulty and need replacement.