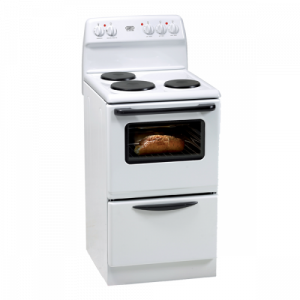
Kelvinator stove repairs
Troubleshooting a Kelvinator Stove can be tricky and time consuming, but with the right tools and knowledge, you can easily identify the problem and find a solution. With this guide, you’ll learn how to pinpoint issues, from simple repairs to complex ones, in order to get your stove back up and running as soon as possible. – Kelvinator stove
Why We’re Your #1 Choice for Kelvinator Gas Stove Repairs
We Know Kelvinator Inside Out: Our technicians specialize in Kelvinator appliances. We understand their unique designs and common issues, guaranteeing a quick and accurate diagnosis.
We Carry the Right Parts: We maintain a stock of genuine Kelvinator parts. This means faster repairs and no waiting around for obscure components to arrive.
We Fix it Right the First Time: Our expertise translates to efficient repairs. We get your stove working flawlessly on the first visit, saving you time and frustration.
We Respect Your Schedule: We offer flexible appointment times and arrive on schedule. We value your time and work to minimize disruption to your routine.
We’re Always Here to Help: We provide excellent customer support. Whether you need advice or a follow-up service, we’re readily available to assist you.
Before you start troubleshooting, it’s important to determine if the power source is working properly. Start by checking that the cord and outlet are securely plugged in, then reset the power breaker. If your Kelvinator Stove does not work after these steps, then it’s time to move on to more complex troubleshooting techniques.
Cleaning the burner head cap is one of the most common troubleshooting steps for a Kelvinator stove. Make sure to use a soft damp cloth when cleaning any area of your stove, as abrasive or harsh cleaners could potentially damage the surface. Use a brush or toothpick to remove any built-up grease and debris from the cap. Next inspect the burner head cap and replace it if it’s damaged or cracked. After cleaning and inspecting, check that the lighter is working correctly by switching it on and off, then reinstall the head cap back onto the stove.
Another troubleshooting step for resolving issues with a Kelvinator stove is to clean the electrical connectors on the rear of the unit. Unplug your Kelvinator stove from the power source first, then remove the bottom drawer or corresponding surface panel. Inspect the wiring harness and be sure to check for any dirt, dust, or other debris that could cause a short circuit. Then use a soft damp cloth to clean away any buildup and repair any loose wiring. Finally reconnect all wires and reinstall the drawer or surface panel before plugging in your Kelvinator stove.
Before troubleshooting your Kelvinator stove further, make sure to check the cables connecting to back of the unit. Unplug your Kelvinator stove from the power source and remove the bottom drawer or corresponding surface panel. Inspect the wiring harness and make sure it’s properly connected. Check for any dirt, dust, or other buildup that could cause a short circuit and use a soft damp cloth to clean away. Reconnect all wires before plugging in your Kelvinator stove again.
Kelvinator Oven and Stove Repair Services
Book a repair today!
Caring for your stove is essential for its longevity and optimal performance. Here are some tips to help you take care of your stove:
Clean often : To keep your stove in good condition, it is crucial to clean it regularly. Wipe the stove’s surface and knobs with a damp cloth and mild detergent. Avoid using abrasive cleaners or pads that could scratch the surface.
Use proper cookware: When cooking on your stove, it’s important to use the right cookware. Make sure that the bottom of your pots and pans is flat and matches the size of the burner. Using warped or damaged cookware can damage the stove and reduce its efficiency.
Check and clean burners: The burners on your stove should be cleaned periodically to prevent blockages or clogs. Check the burners for any food debris or grease buildup and clean them with a soft brush or cloth.
Check the oven seal: The oven’s seal is essential for keeping the heat inside and ensuring efficient cooking. Check the seal for any cracks or damage and replace it if necessary.
Avoid harsh chemicals: Don’t using harsh chemicals or abrasive cleaners on your stove as they can damage the surface and reduce its lifespan. Stick to mild detergents and natural cleaners like vinegar or baking soda.
Smart Appliance Centre
14 Blackburn road Durban North , 4051
031 562 0666

